Take your junk drawer and clothing storage from time-wasting disaster to simply organized with recycled items and dollar store finds!
First Up: Junk drawer organized with $2 and 10 minutes
With good intentions, we try and set a junk drawer up as a miscellaneous, catch-all space. It only leaves us with more stress because things can easily be tossed in, but more difficult to come back out. You just can’t find anything again! In just a few easy steps, and minutes, your junk drawer will be the joyful drawer!

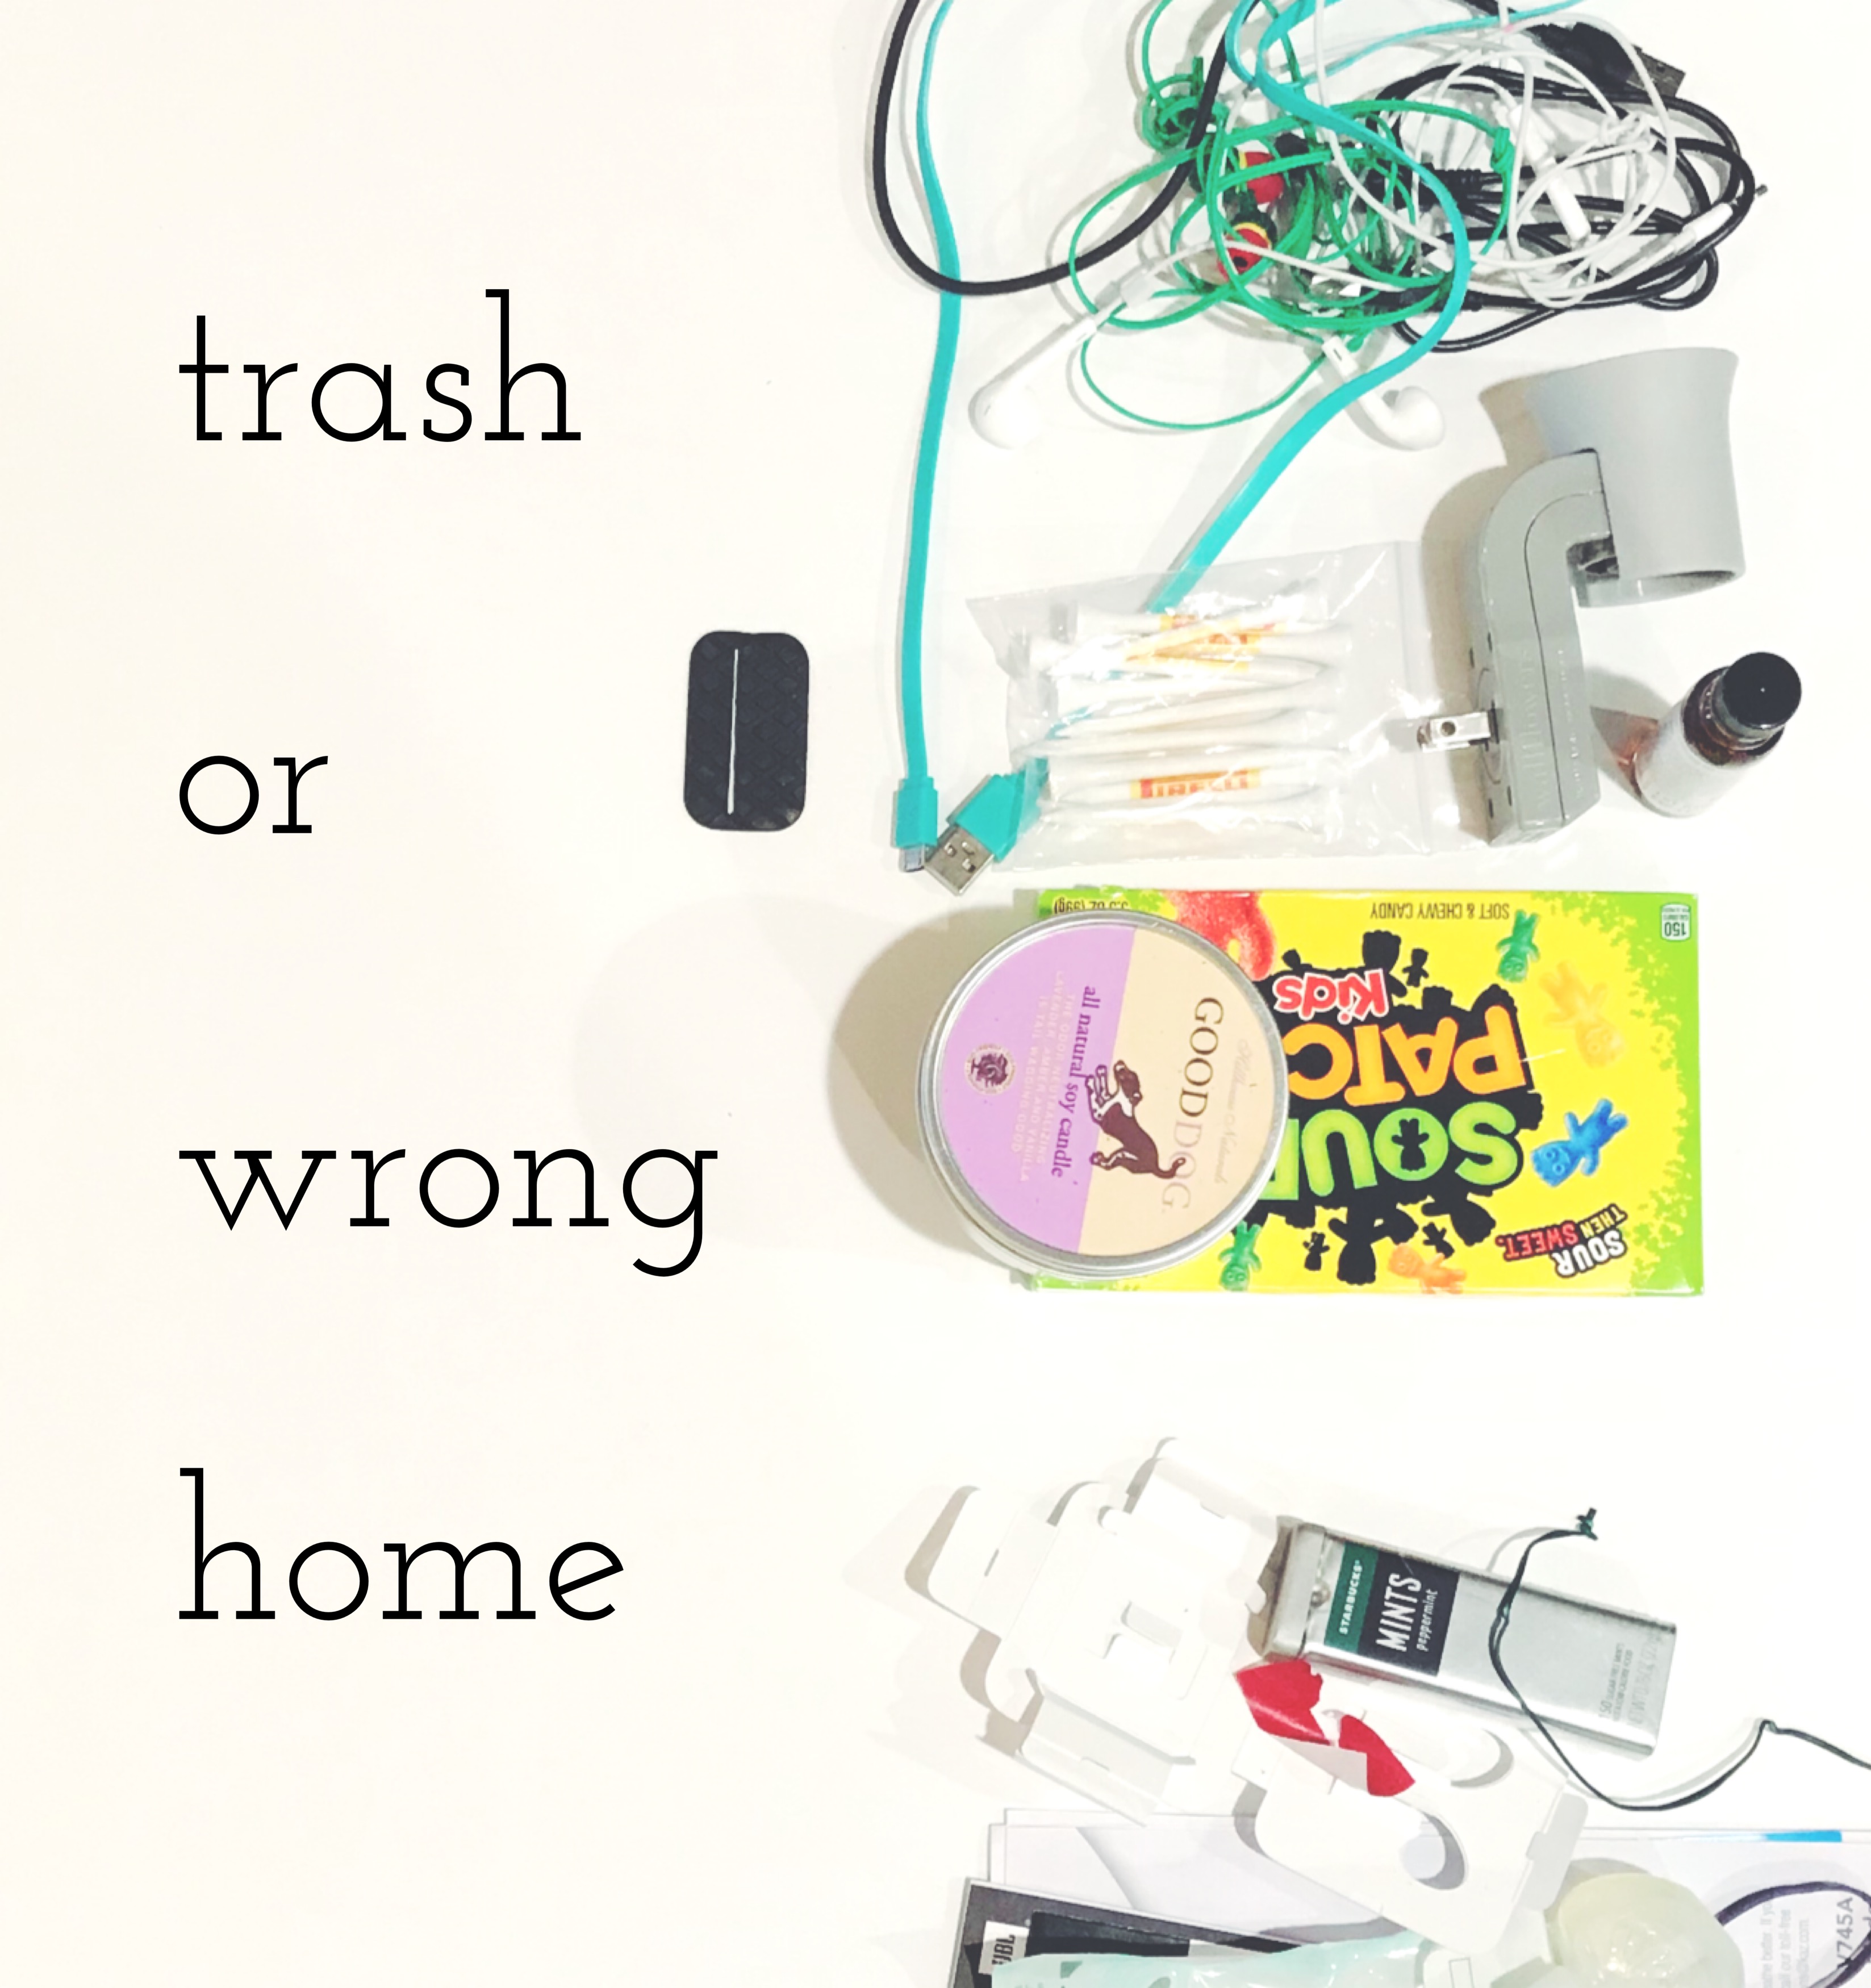
Empty out the drawer – completely!
Organize the items into three categories as you empty: keep, trash, and wrong place. Since this method only takes you 10 minutes, you can go through this process again, in the future, if the drawer gets too out of control. Be thoughtful of what you are putting in the junk drawer and if it already has a home – get it there, not the drawer. These were all the items that weren’t going back in!
Clean the drawer out with your favorite cleaner
Don’t skip this step! I love the smell of my all natural cleaners and it will boost my mood and motivation too! The more excited you are for your final result, the more likely you are to keep the habit going. If I have the time, you will also find me wiping down the contents in the drawer before putting them back in 🙂

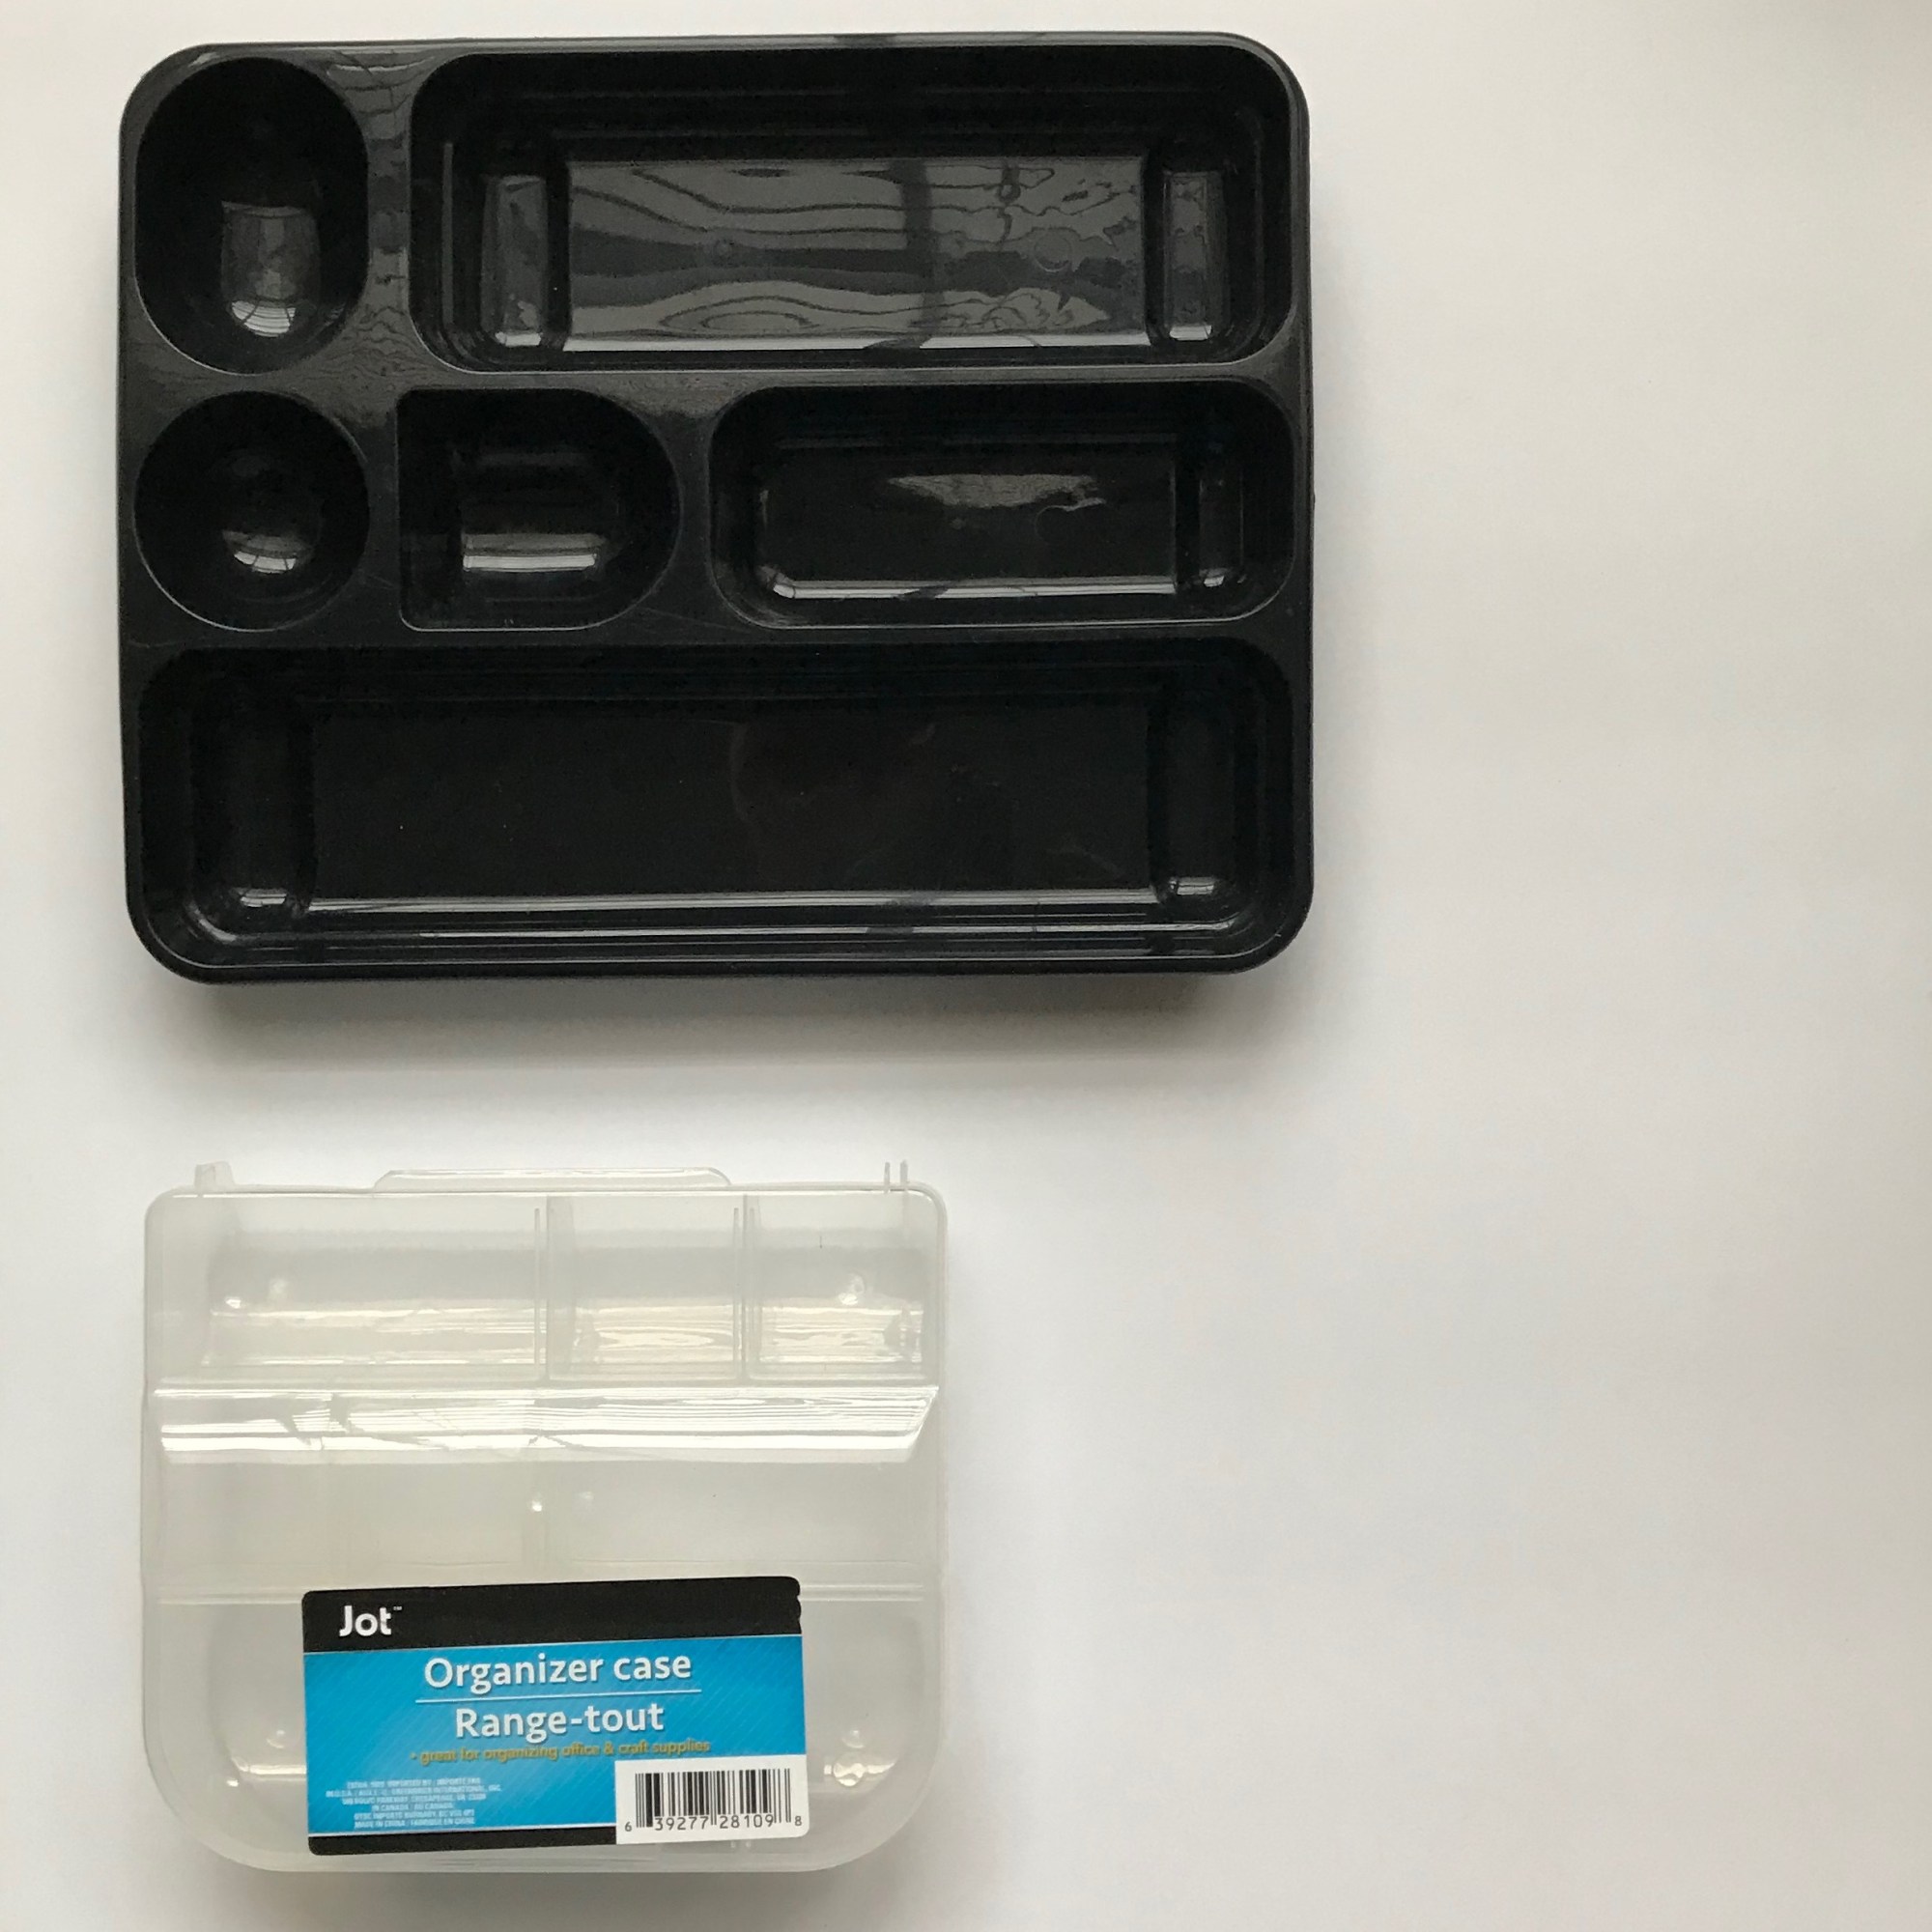
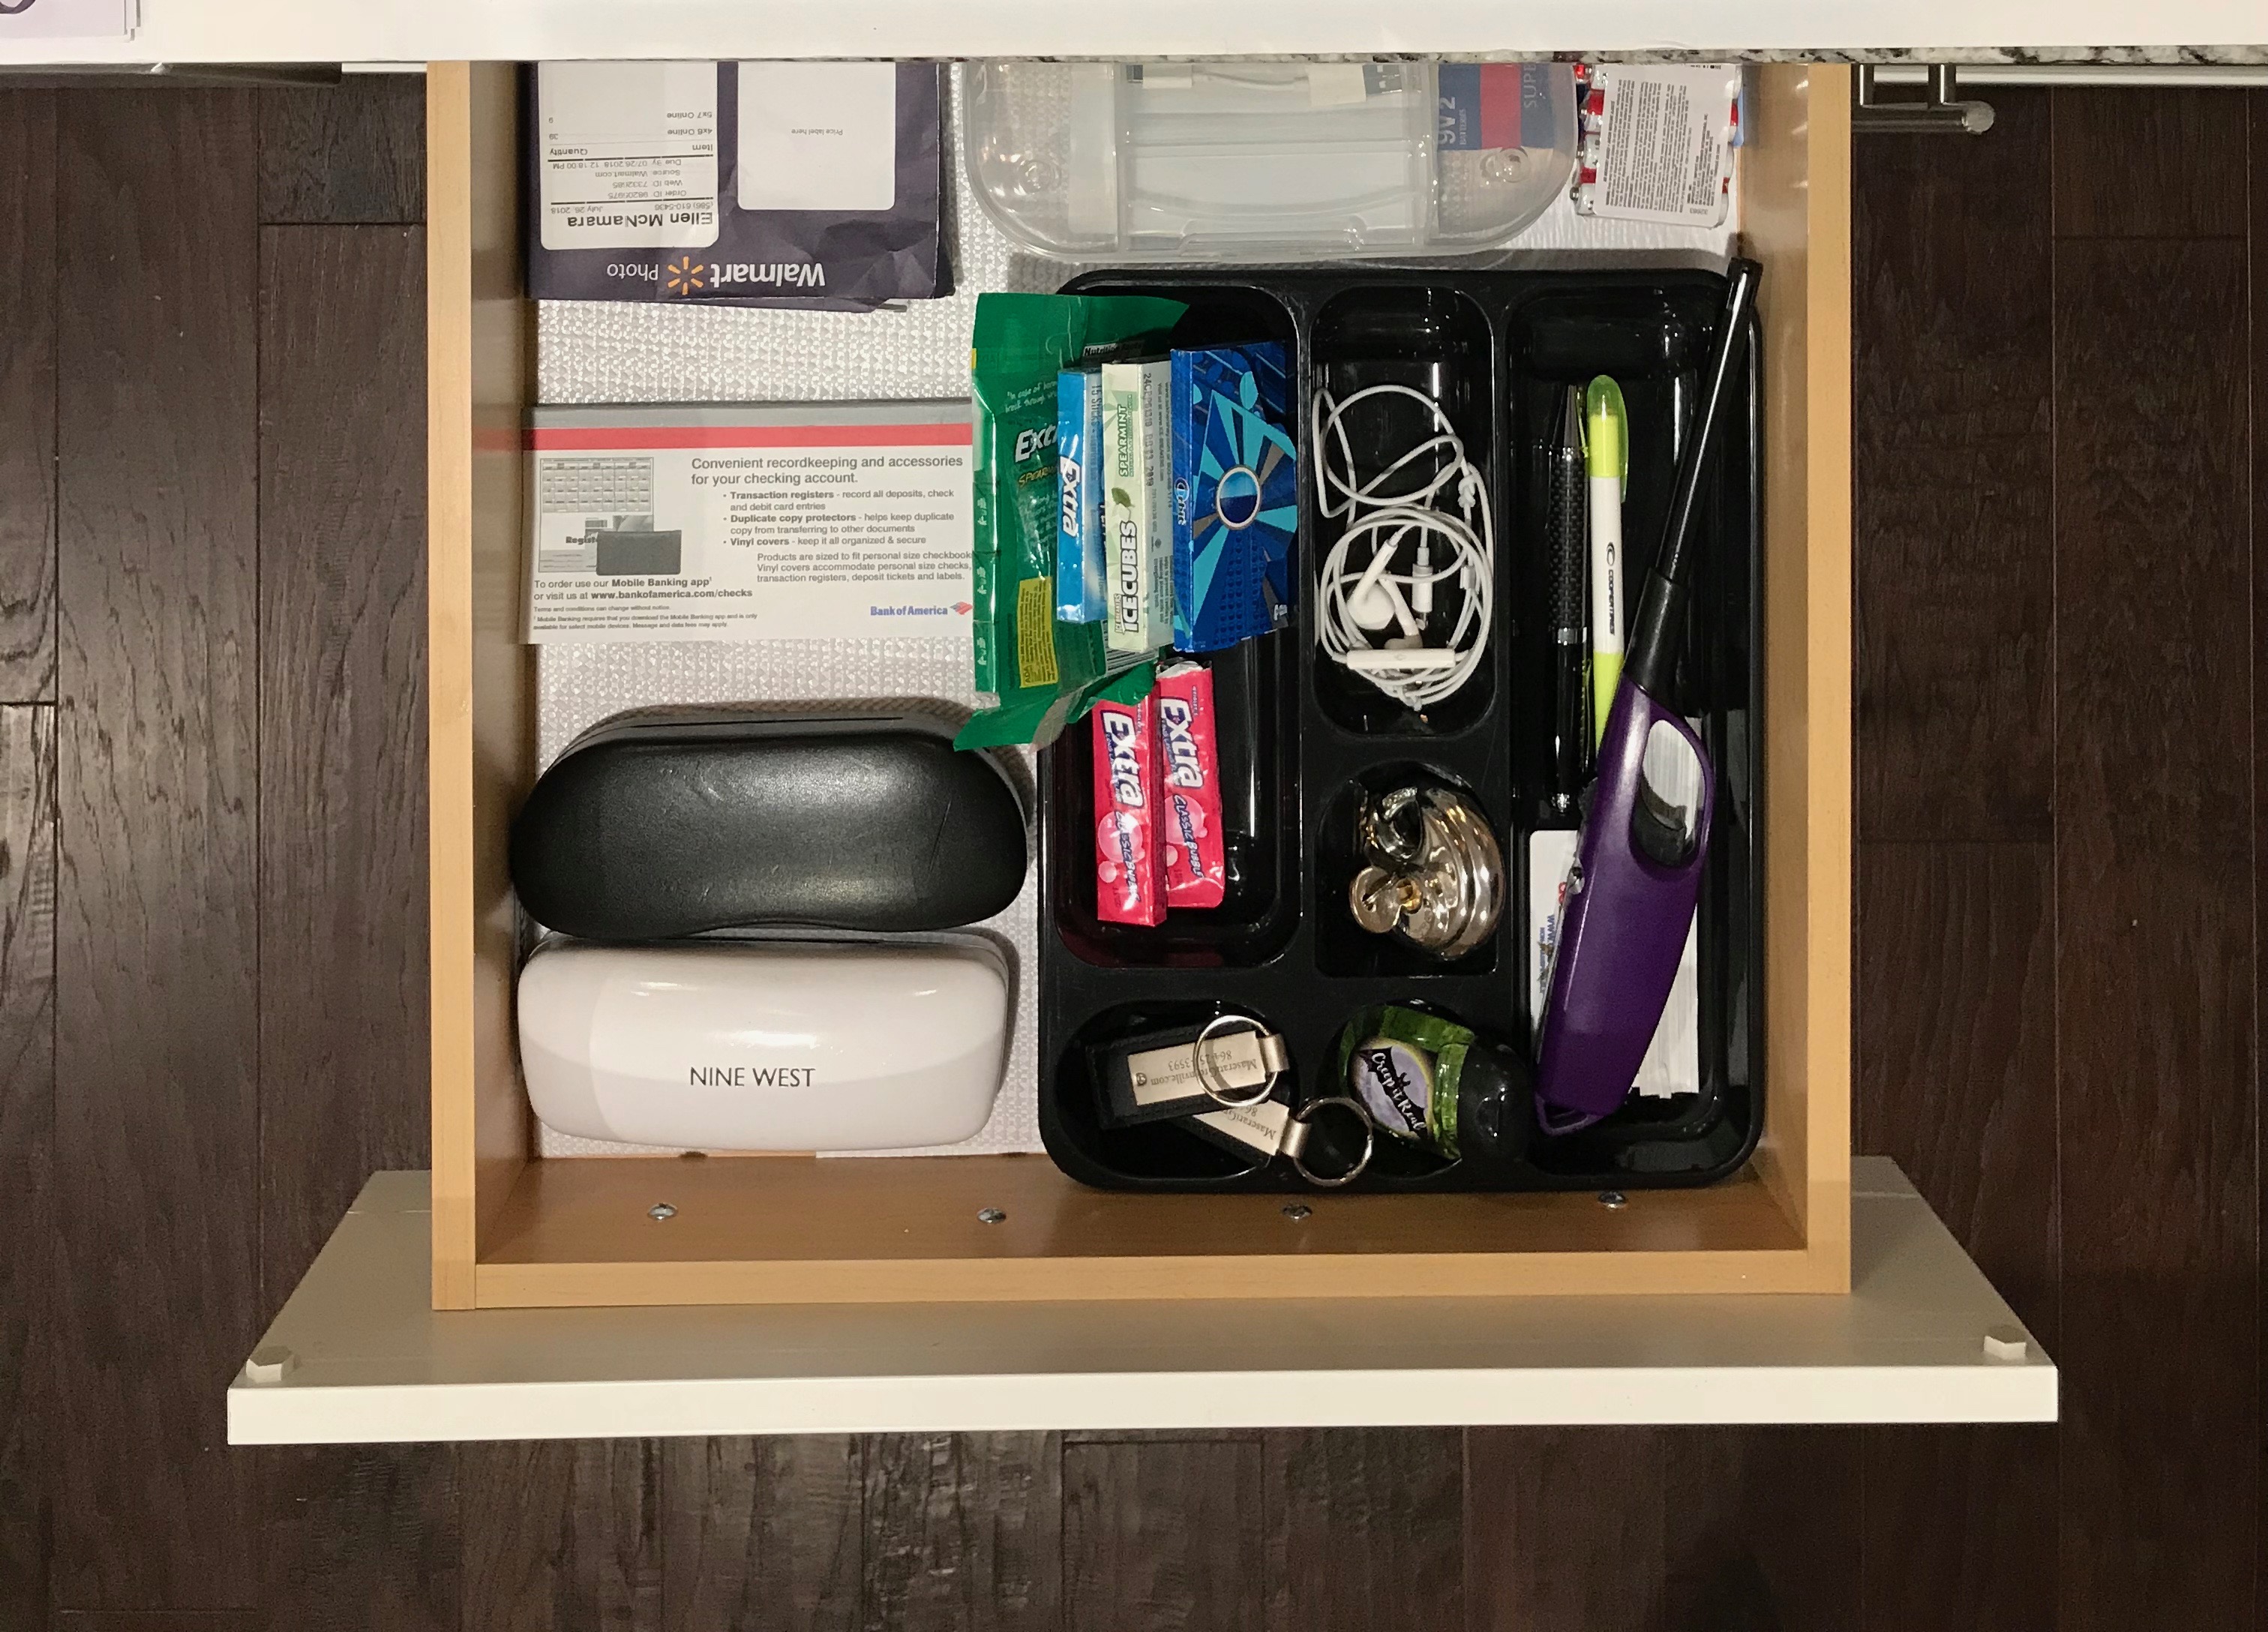
Decide where your dollar finds will work best and fill it up!
Since I’m right-handed, I tend to like my pens, markers, scissors to the right inside the drawer. Bulkier items that I don’t use very often (batteries) get sent to the back. Find what works for you! These two storage finds are from the Dollar Tree. The organizer case is for smaller batteries and charger pieces. The black tray is perfect for items like pens, hand sanitizer, gum (there was so much gum hiding in the drawer!)
Check out my time lapse Instagram video of the whole process! It truly was 10 minutes from start to finish – so you can do it!


Next Up: It’s time to get your clothing out of a wad for Free!

It’s the same step by step process for any drawer: empty, clean, and only put back what you need!
Empty and sort clothing into piles
For clothing, I add a few extra piles in order to take items to giveaway or resale. There are some items you should toss unless a charity specifies they’ll take them: socks with holes and underwear. Items that I will not wear that season go into a seasonal storage bin that stays in the basement or guest room. When the season’s change, I typically do the sorting through the process and try to stick to a 10 rule – no more than 10 of socks, underwear, etc. The more clothing, the bigger the laundry pile and the more space it takes up.
Use the 3 R’s! Recycle, Reuse, Reduce
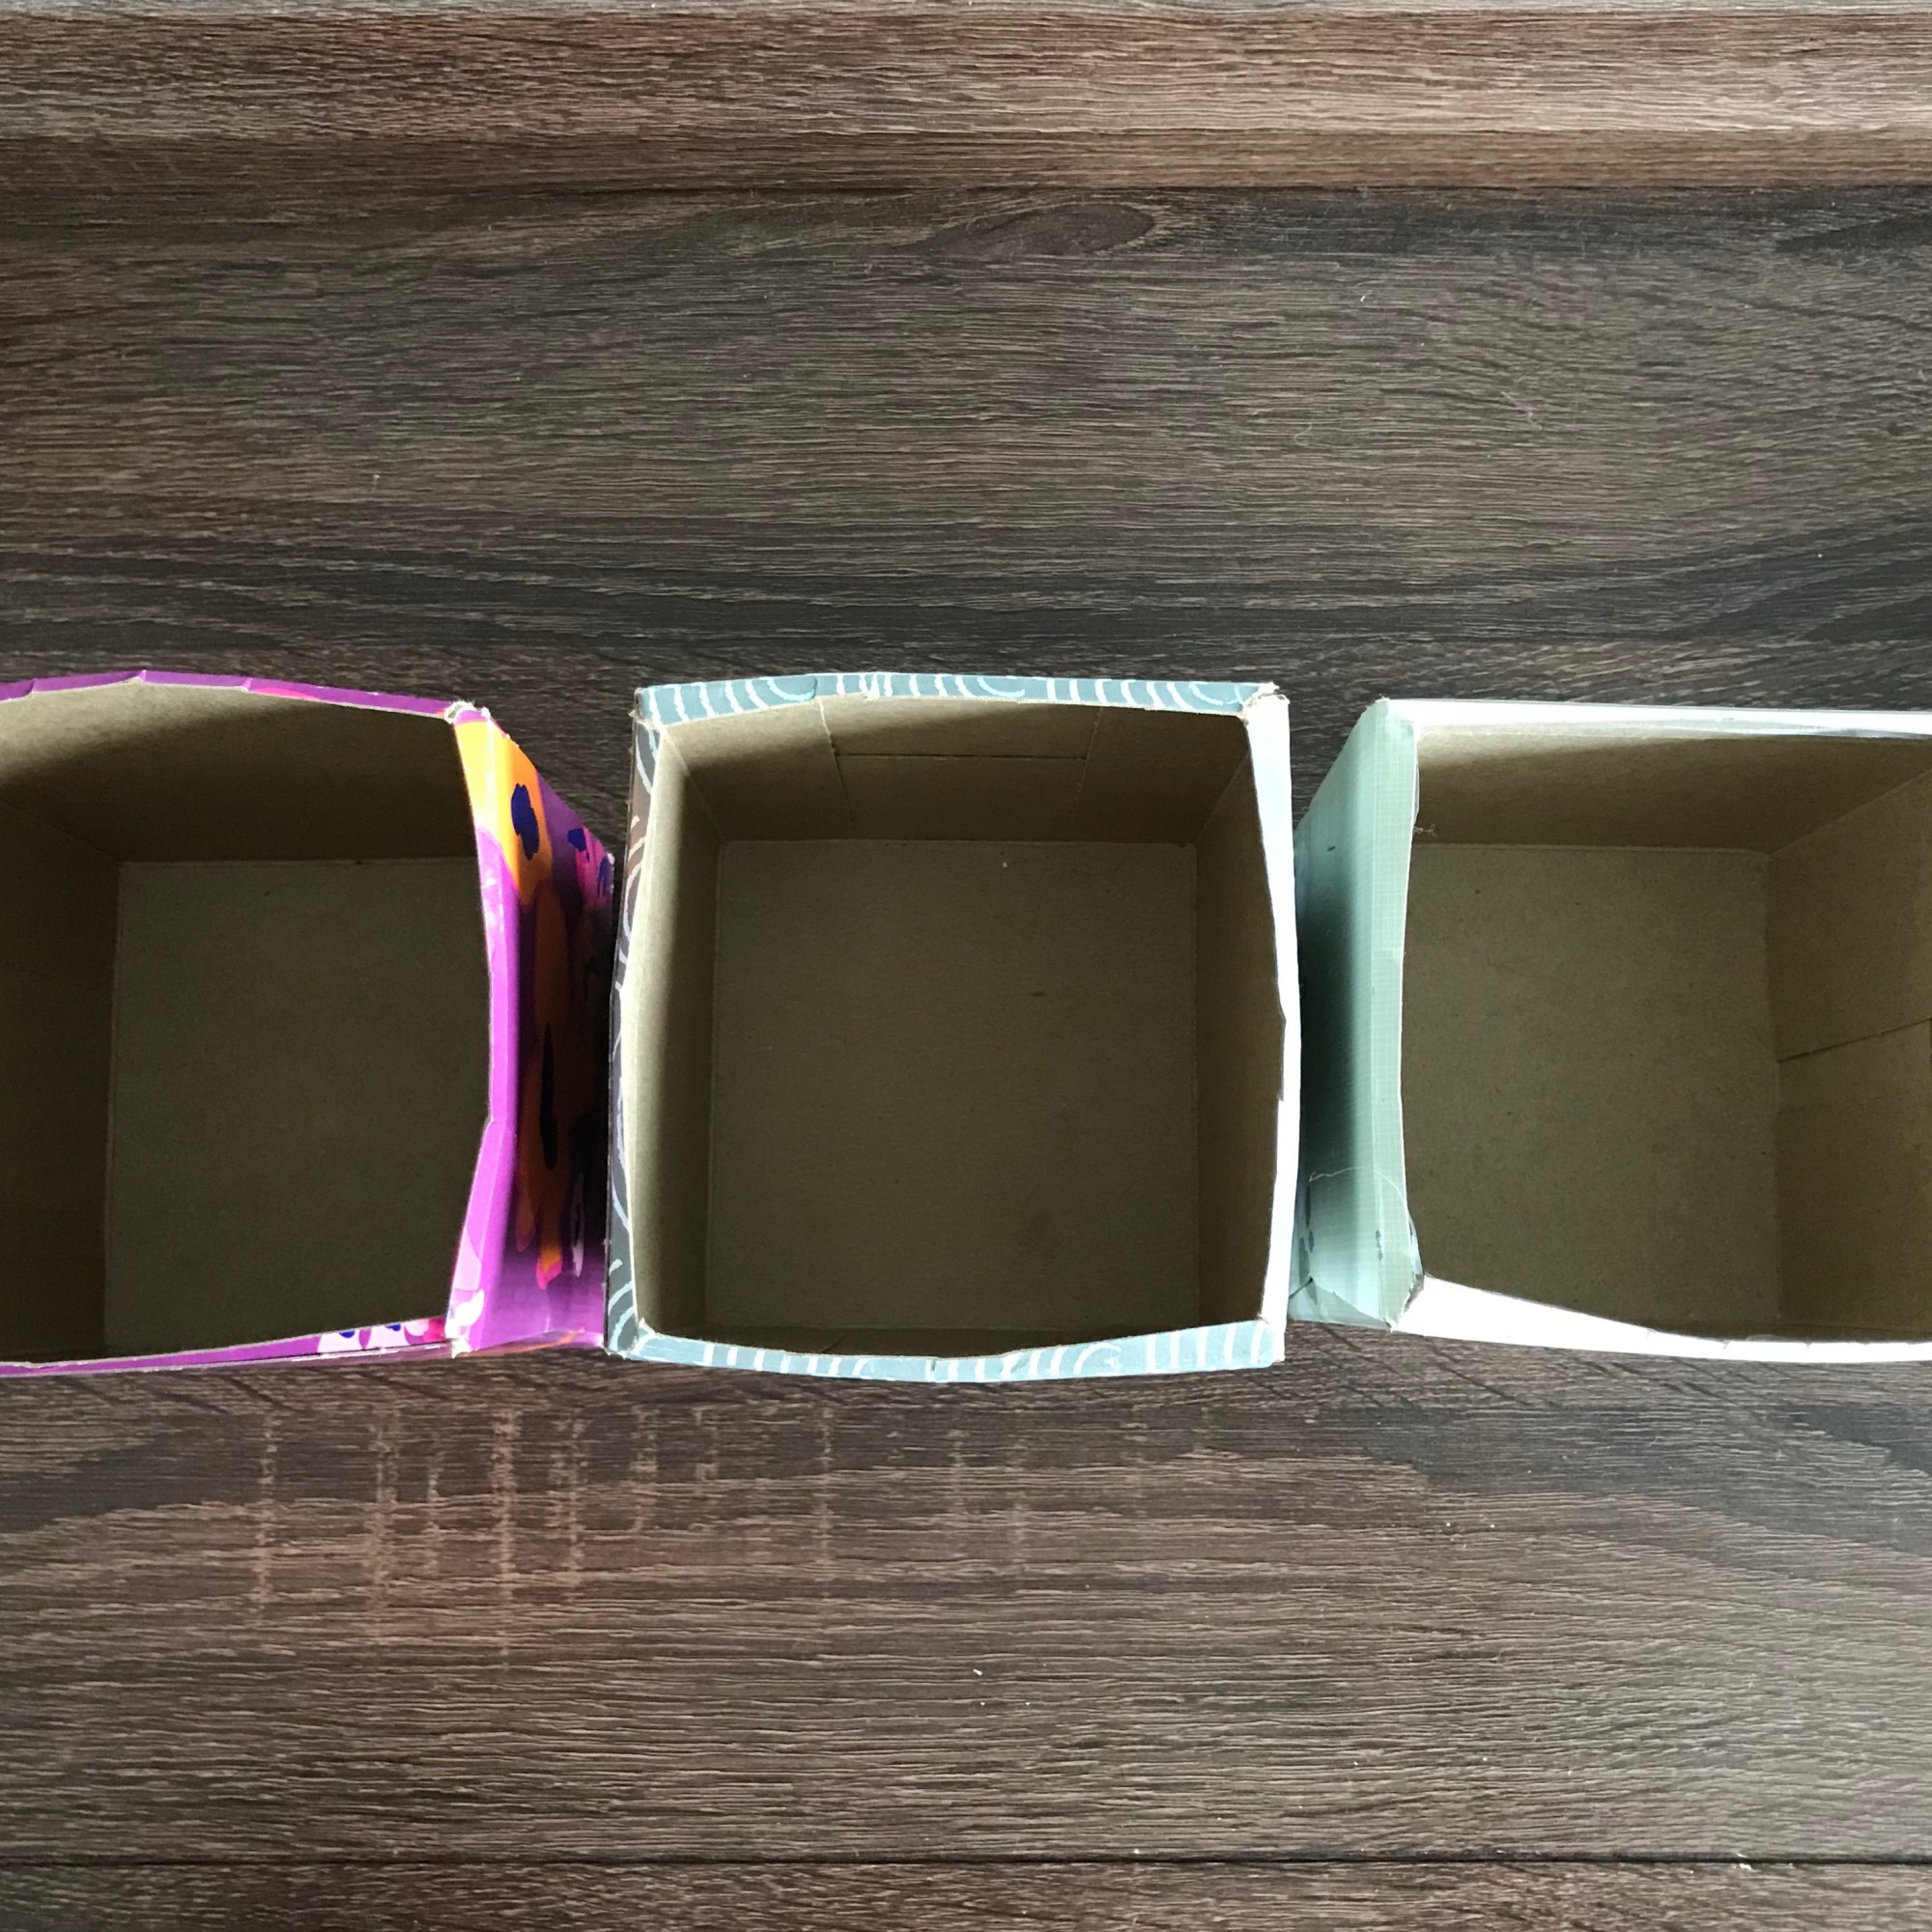
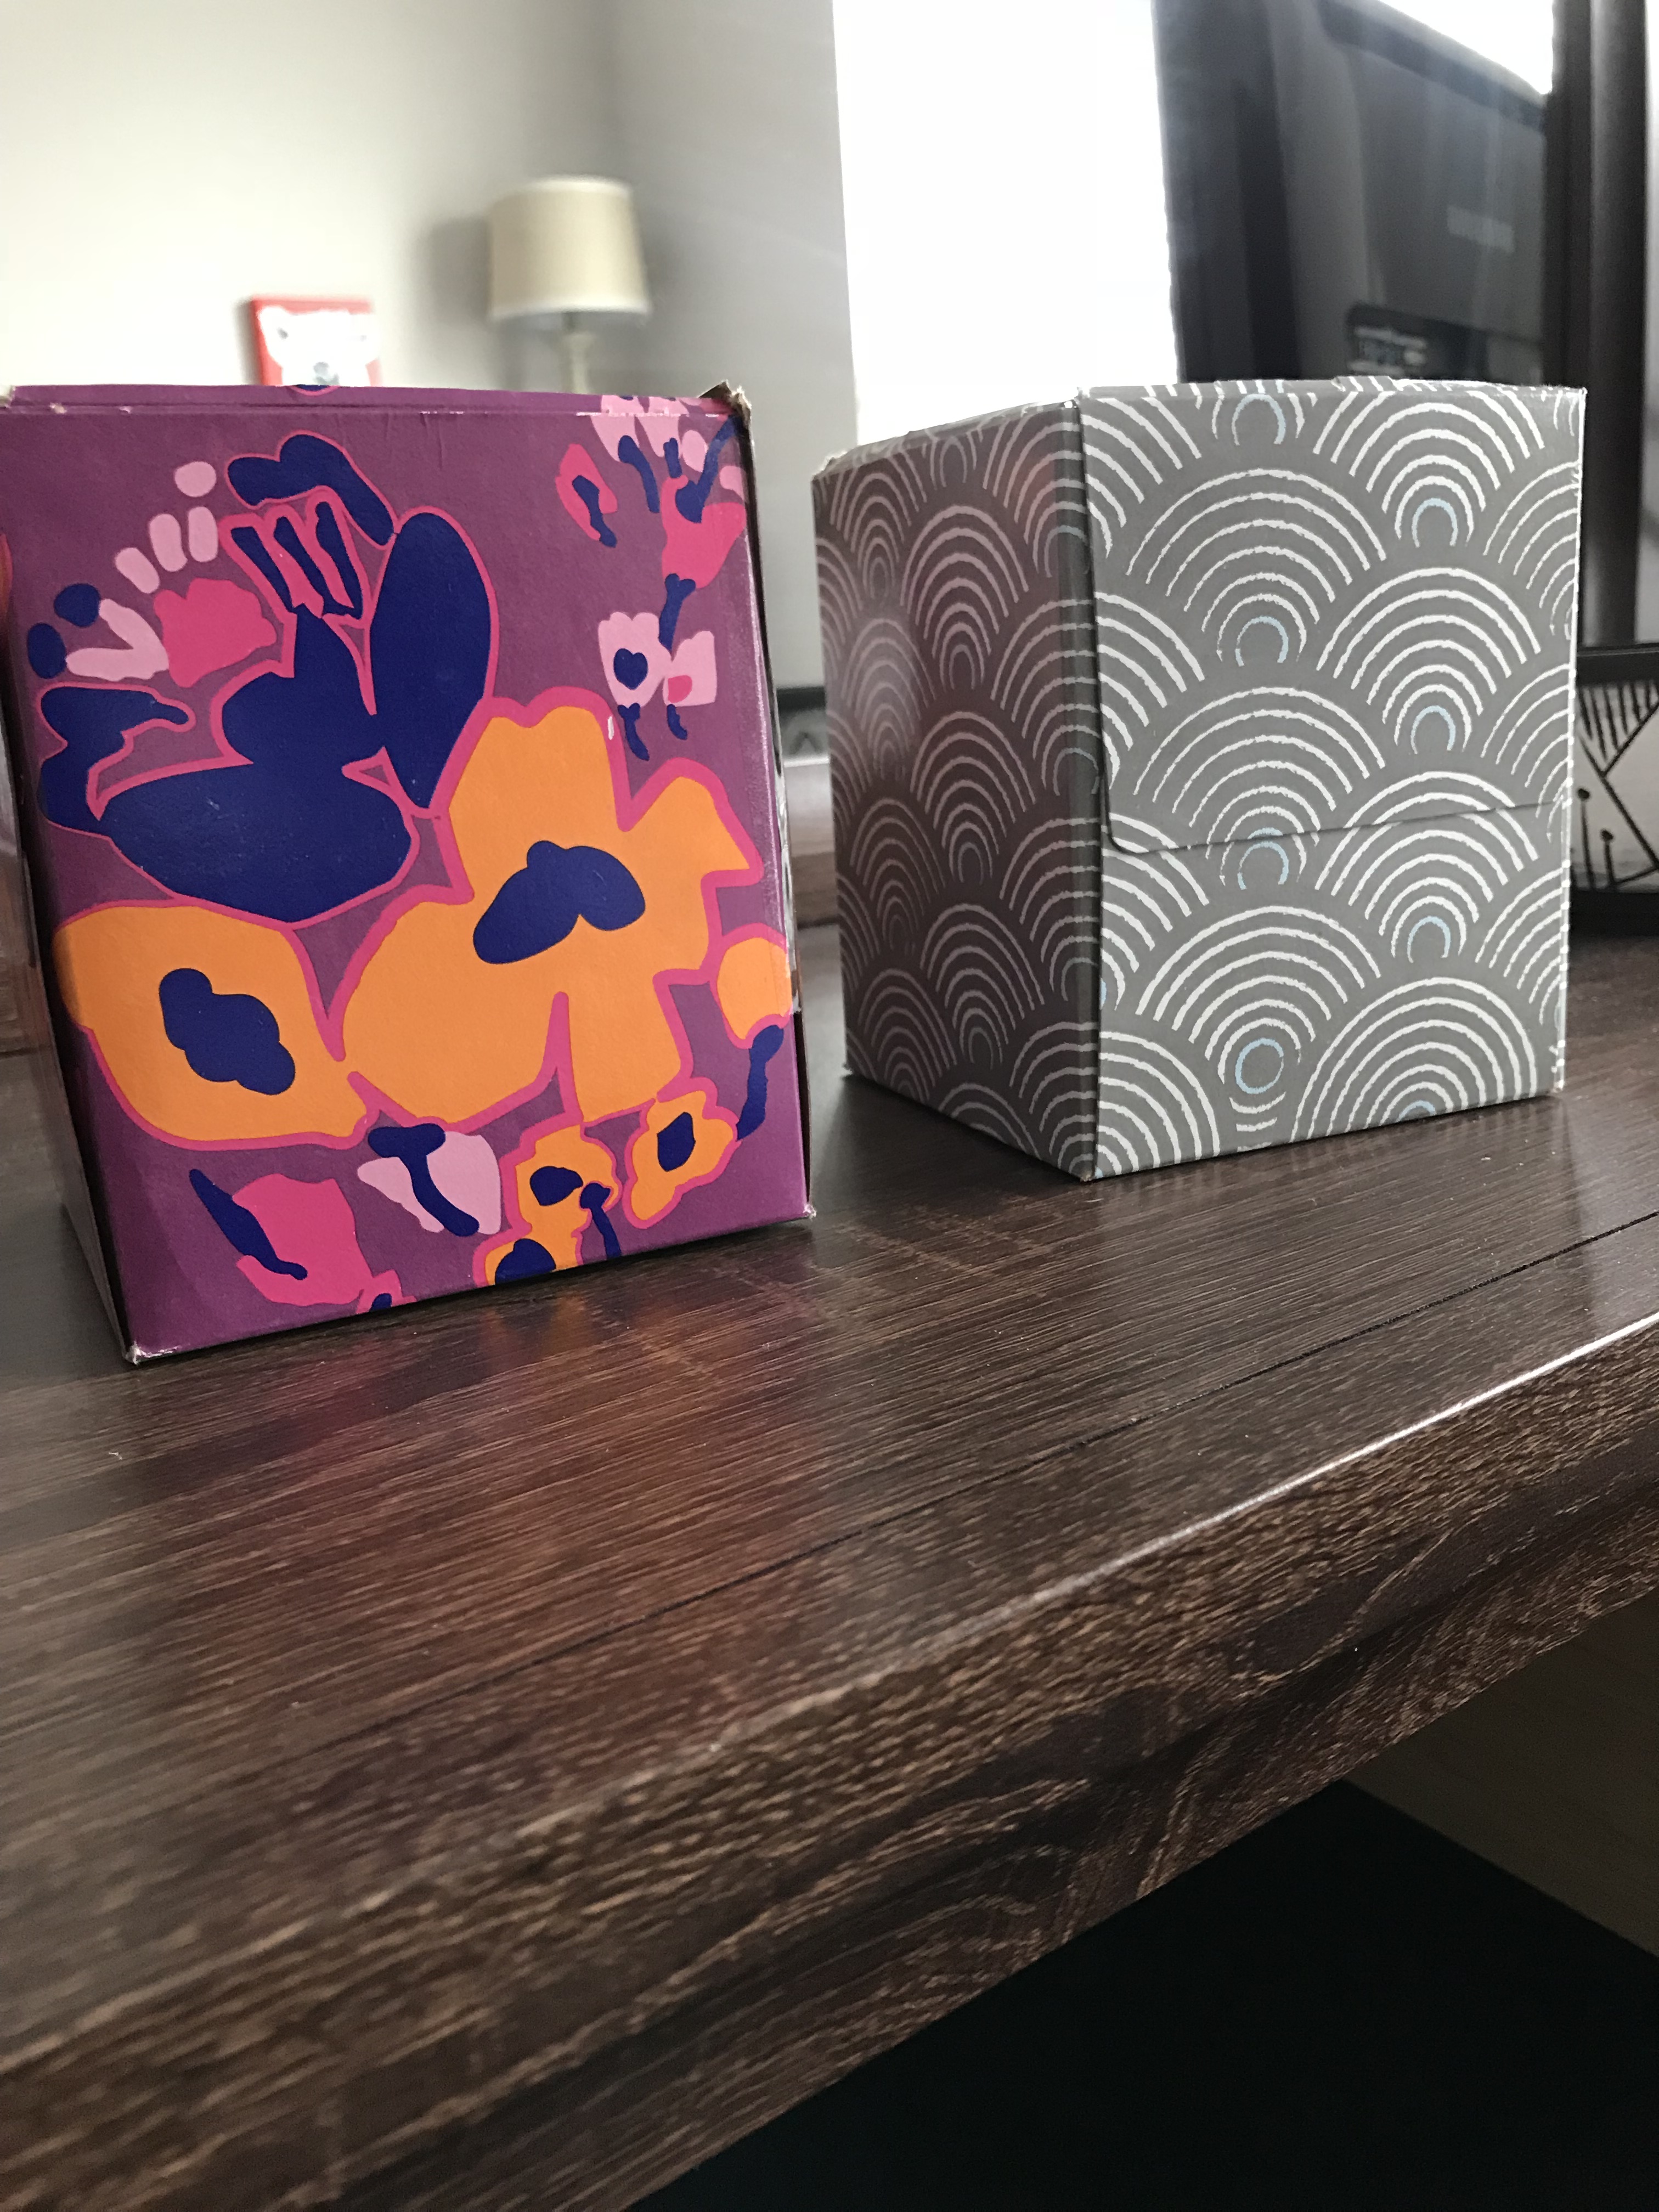
I’ve been using empty tissue boxes as storage containers for a long time. Especially when they have fun designs on them. These are the perfect size for ankle and no-show socks. Separating socks by color makes it quick and easy to get what you need to complete your outfit. The Dollar Tree also had some great finds that fit perfectly into my drawers. You can purchase them in bulk or hunt for them at the store.
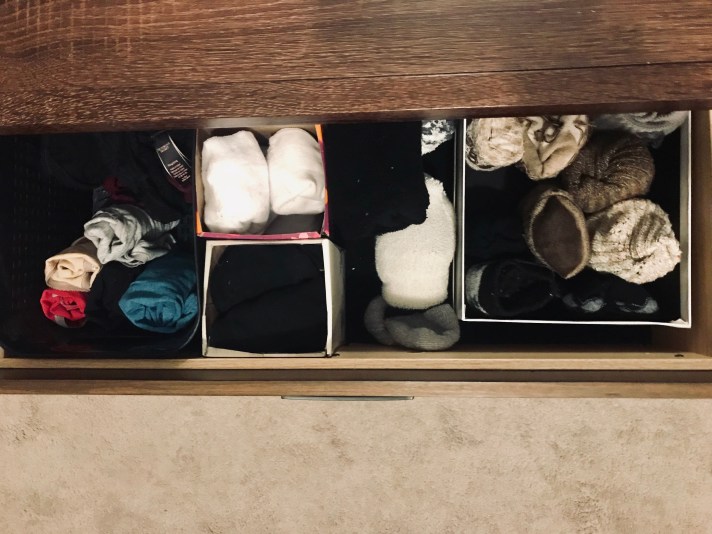
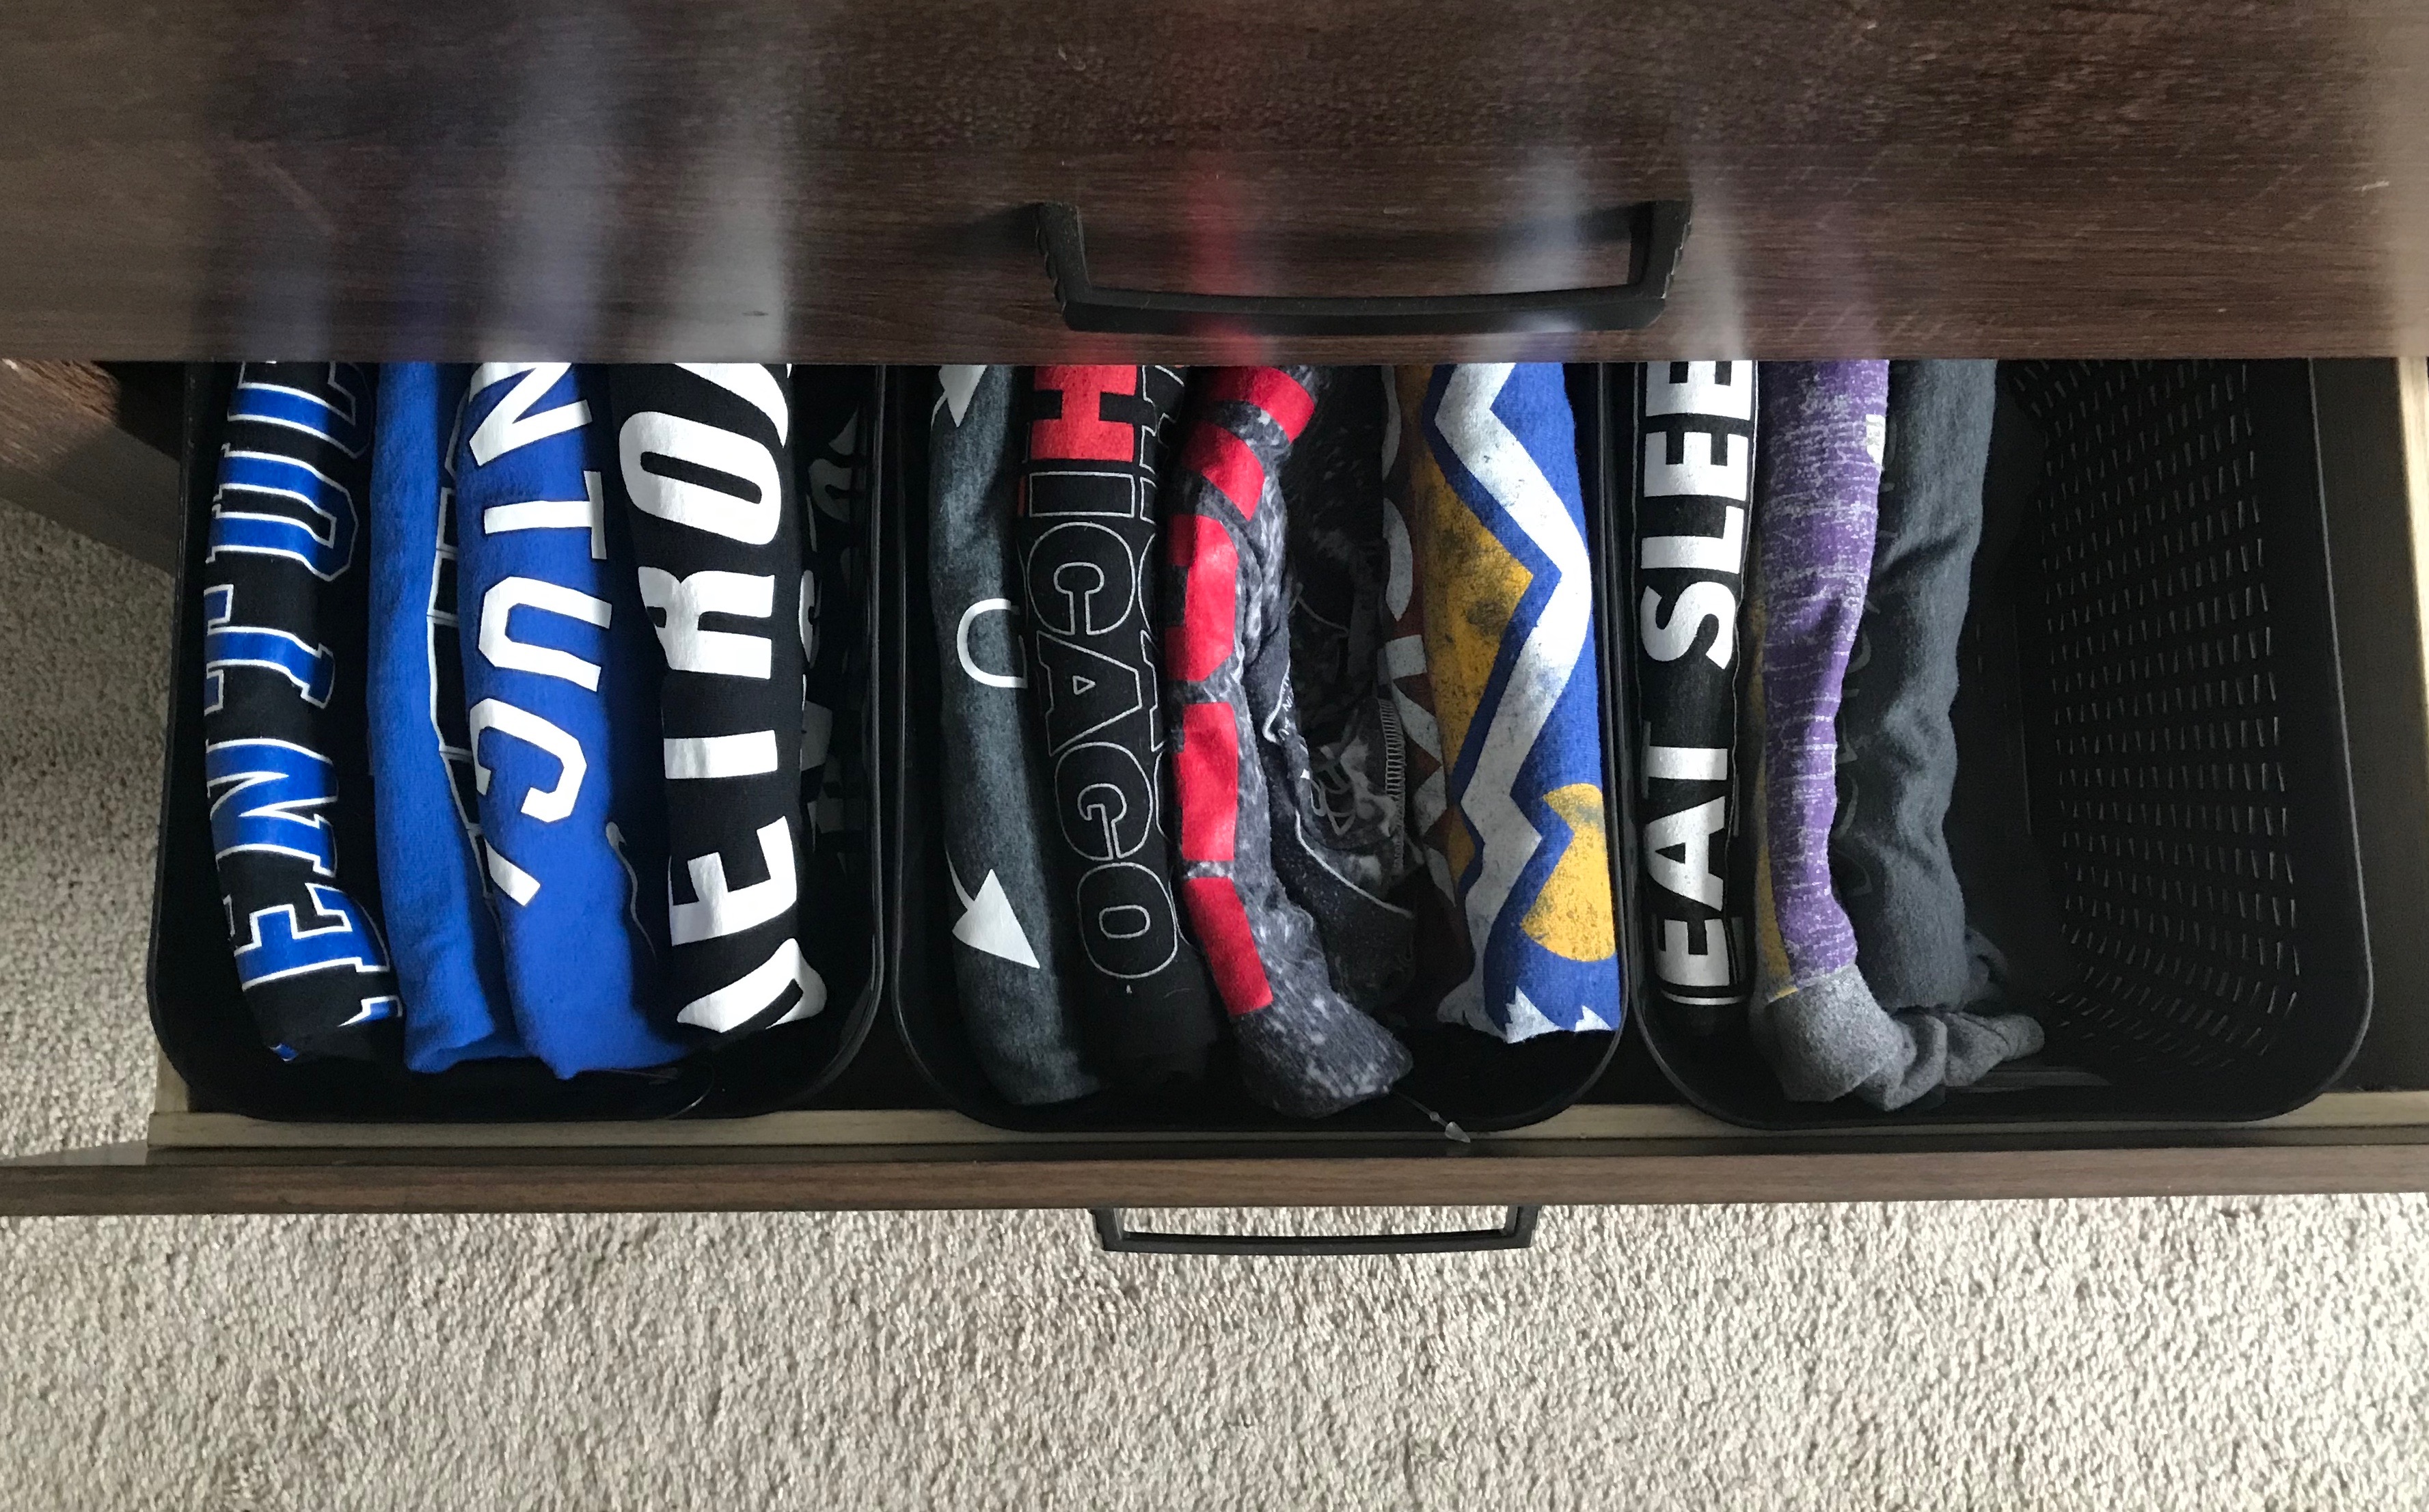
Fold and place like items in the containers
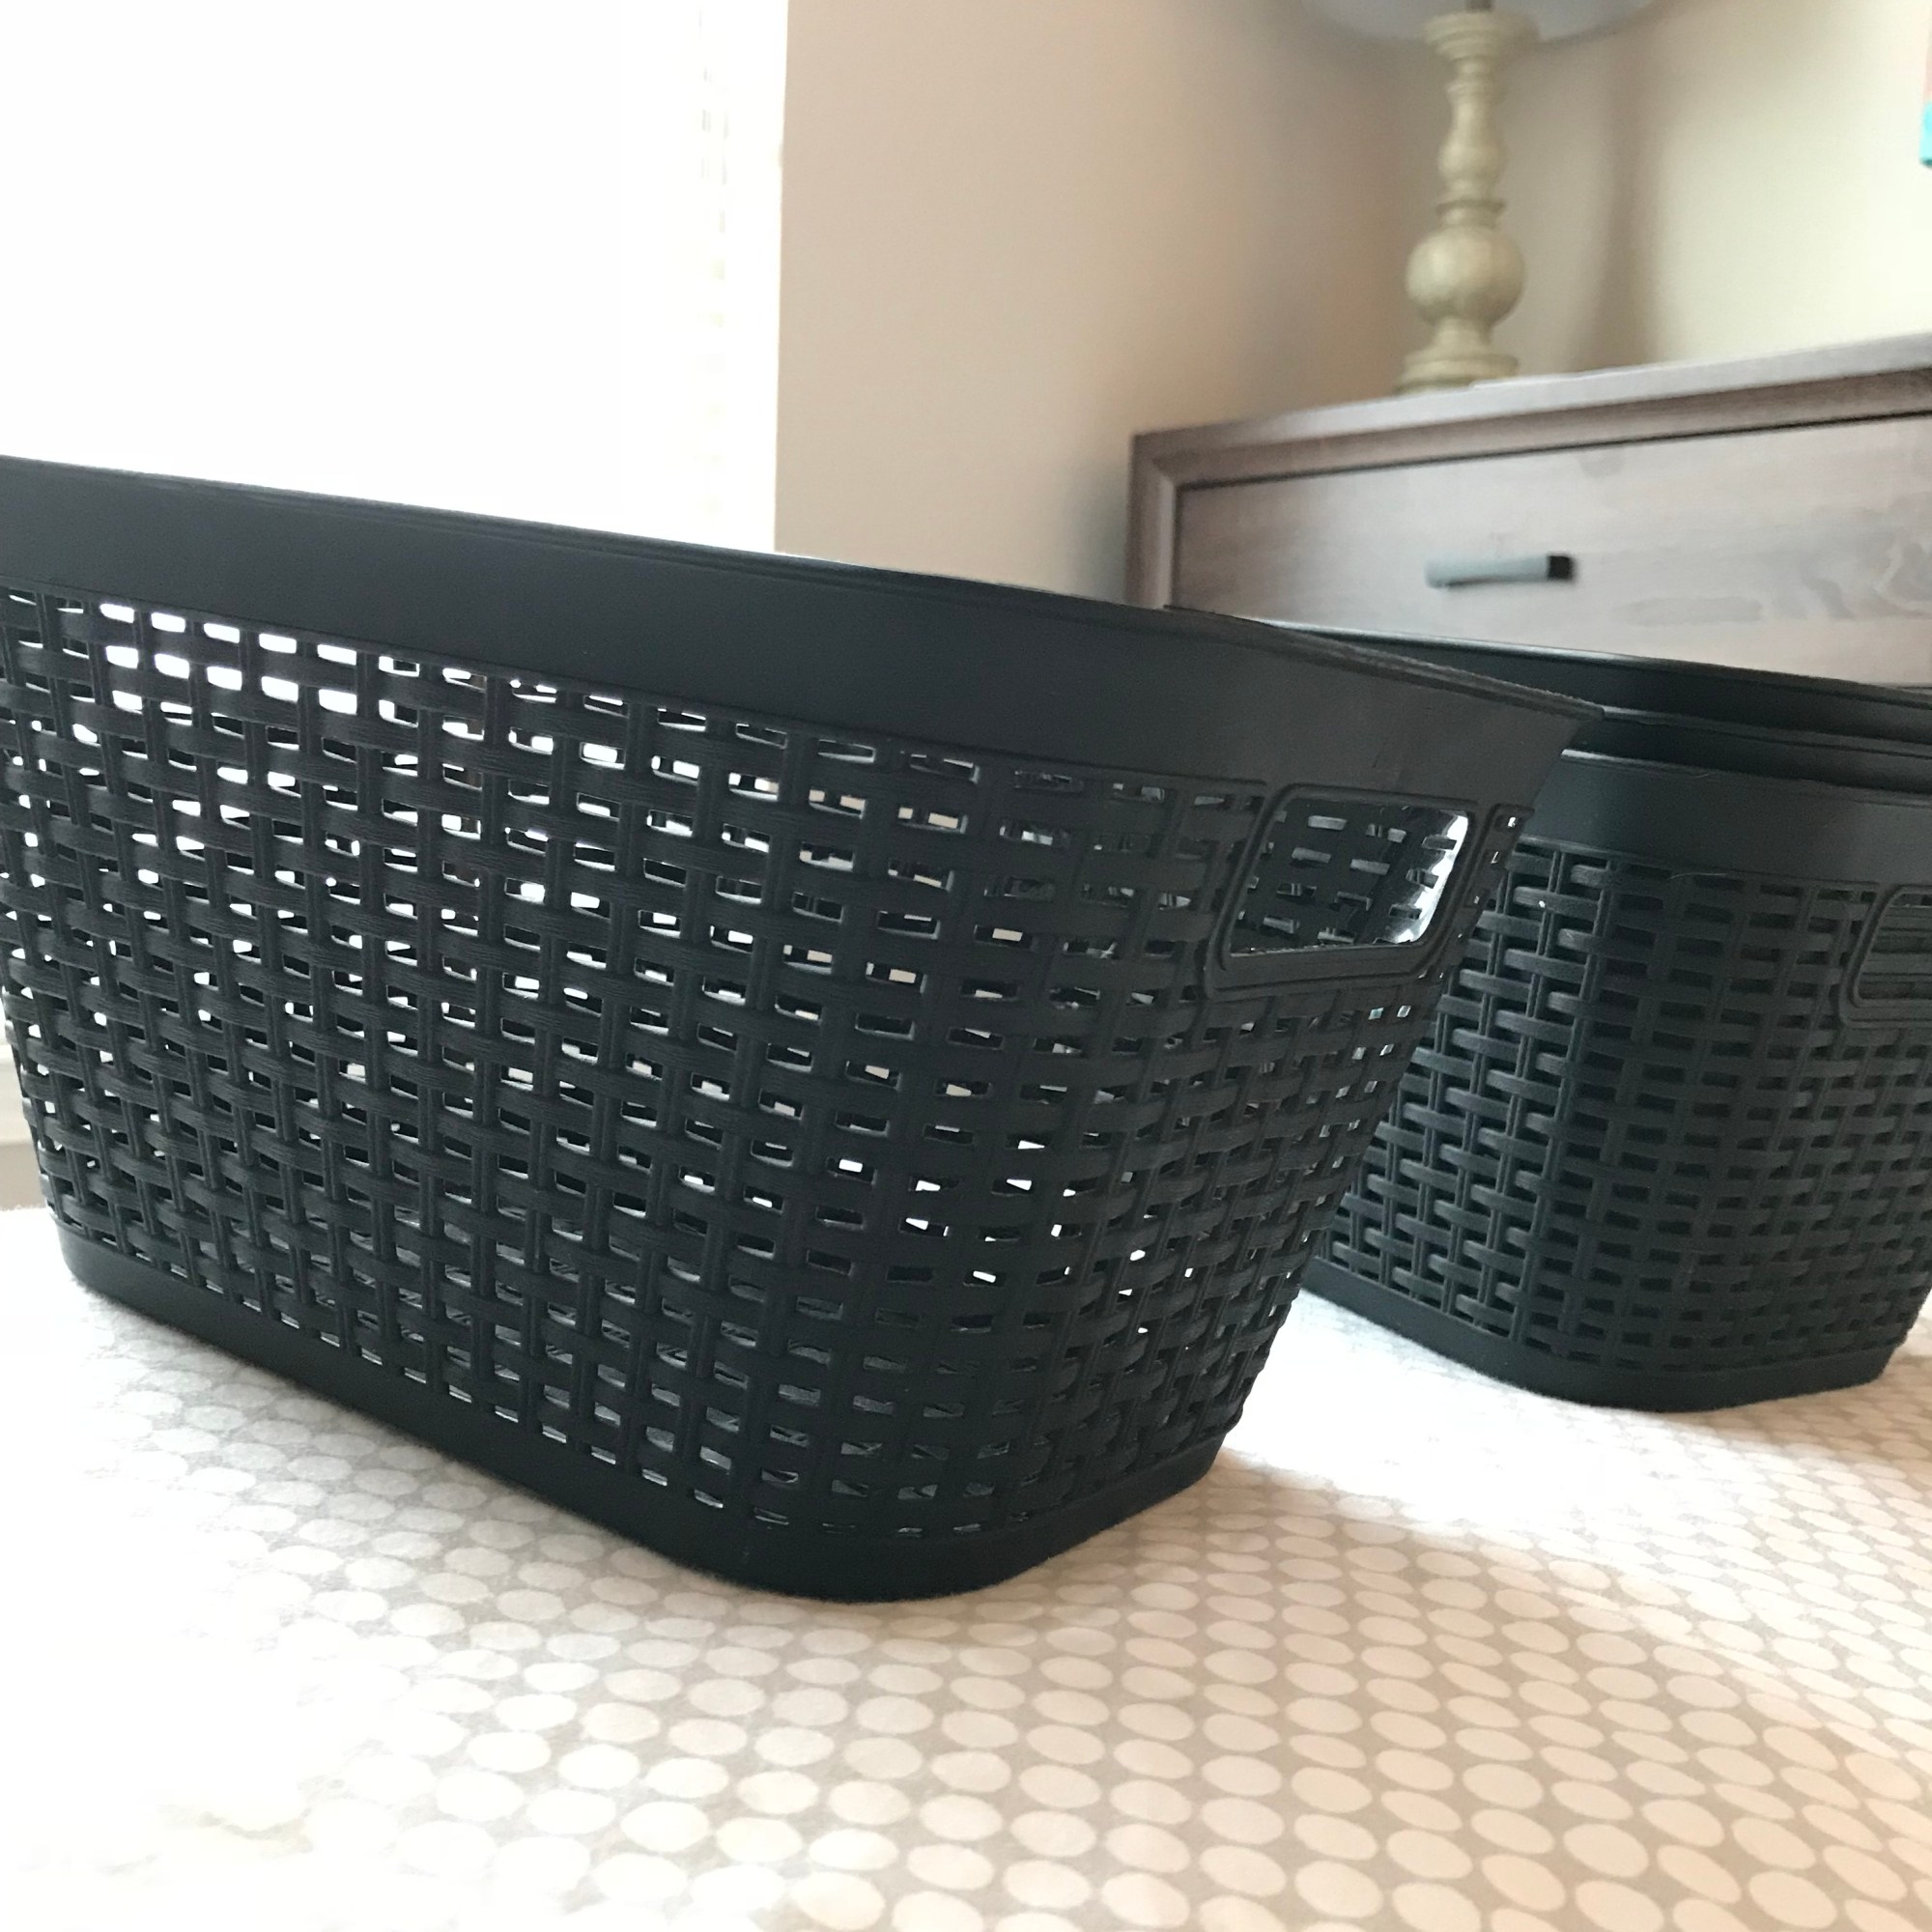
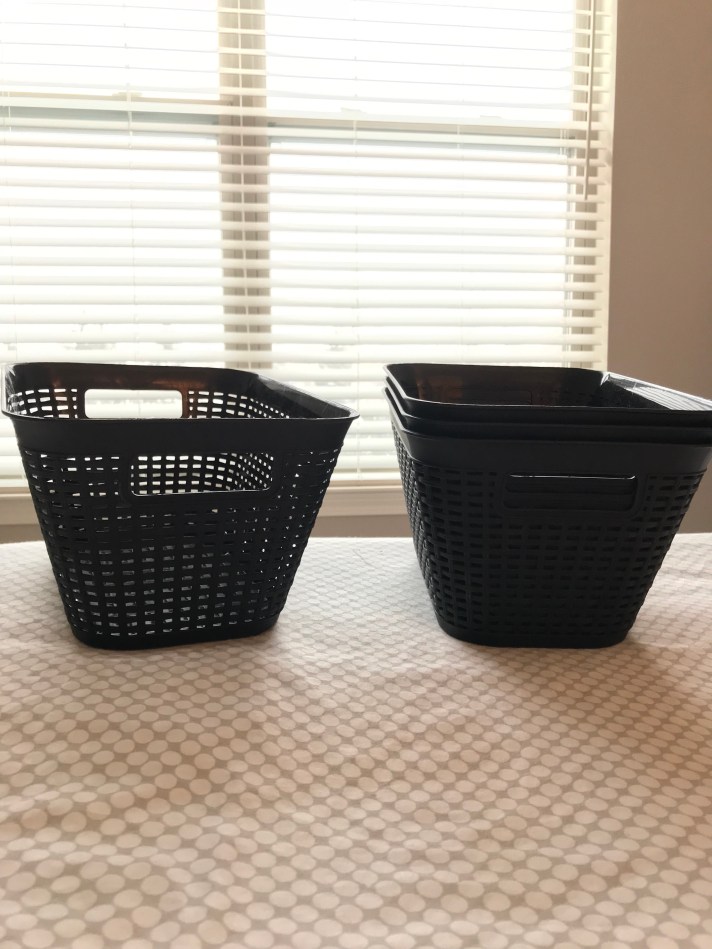
T-shirts will fit nicely stacked on their sides in shoe boxes, or if you find these baskets from The Dollar Tree – they’re only $1! You can check out the Kono Method for a how-to fold! Underwear can be rolled for more space and long socks work with old-fashion folding and standing up.
Ta-da! Enjoy your tidy space and time saved searching for your favorite tee!